The Powerful Impact of Green Screen Photography: Taking Your Images to New Heights
Share
.jpg)
Green screen photography, also known as chroma key photography, is a technique that allows you to replace the background of an image or video with any digital backdrop or visual effect. It offers endless possibilities for creative expression and has become a popular tool in various industries such as film, photography, and video production.
Green screen photography works by using a green-colored backdrop, commonly a green fabric or a green-painted wall. The green color is then digitally removed or "keyed out" during the editing process, allowing the desired background to be inserted seamlessly.
There are several benefits to utilizing green screen photography. Firstly, it provides versatility in backgrounds, enabling you to transport subjects to any location or create imaginative environments. Secondly, it is cost and time-efficient, as it eliminates the need for physical set construction and location scouting. Lastly, it allows for creative freedom, enabling you to experiment with different visual elements and add unique touches to your images or videos.
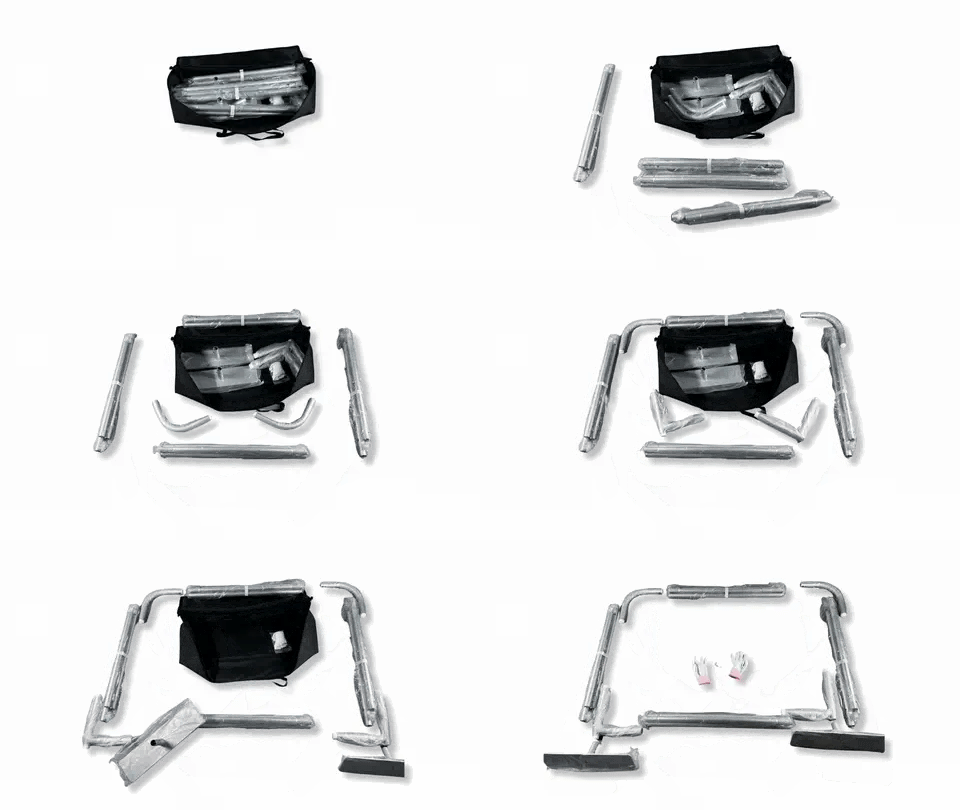
To set up a green screen photography setup, you will need specific equipment. This includes green screen material, proper lighting setup to ensure uniform illumination, and a high-quality camera mounted on a tripod to capture the subject and background accurately.
To achieve successful green screen photography, it is essential to follow certain tips. Proper lighting techniques, such as avoiding shadows and achieving even lighting, are crucial. Distance and positioning of the subject from the green screen are also important to minimize unwanted spillage or color contamination. Wrinkles on the green screen and shadows on the subject should be carefully addressed during the setup.
Editing and post-processing play a significant role in green screen photography. Chroma keying in editing software allows you to remove the green background effectively. Matching lighting and shadows between the subject and the new background is crucial for a realistic composite. Adding realistic backgrounds that blend seamlessly with the subject is essential to create a visually appealing final result.
Green screen photography finds applications in various industries. It is commonly used in film and television production to create realistic or fantastical scenes. Photography studios utilize green screen techniques for creative and customizable portrait backdrops. In recent times, virtual backgrounds in video conferencing have become popular, allowing users to appear in different settings while having virtual meetings.
What is Green Screen Photography?
Green screen photography, also known as chroma key photography, is a technique used to replace the solid green background in images or videos with another desired background. This is achieved by shooting the subjects or objects in front of a green screen and then using specialized software to remove the green color and superimpose the desired background. Green screen photography, also known as chroma key photography, provides creative flexibility and allows for the ability to transport subjects to any location or create fantastical environments. It is widely used in the film and television industry, as well as in photography studios and video production.
How Does Green Screen Photography Work?
How does green screen photography work?
Green screen photography works by utilizing a green or blue background, which can later be substituted with another image or video while editing. The process involves capturing the subject in front of the green screen and then using specialized software to eliminate the green color. The software detects the green pixels and replaces them with the desired background, giving the impression that the subject is situated in a different setting. This technique is commonly employed in the production of movies, television shows, and videos to produce lifelike or extraordinary environments that would be impracticable or unachievable to shoot on location.
Benefits of Green Screen Photography
Green screen photography offers countless benefits that enhance the creative process. With versatile backgrounds, photographers have the freedom to transport subjects to any location or setting. It also proves to be cost and time efficient, reducing the need for elaborate setups or location scouting. The creative freedom provided by green screen technology enables photographers to explore boundless possibilities and unleash their imagination. Dive into this section to discover the remarkable advantages that green screen photography brings to the table.Versatility in Backgrounds
Versatility in backgrounds is a major benefit of utilizing green screen photography. By using a green screen, photographers and filmmakers can effortlessly transport their subjects to various settings and locations, whether they are real or imaginary. This flexibility opens up a world of creative possibilities and allows for the creation of visually stunning and one-of-a-kind images. Examples of the diverse range of backgrounds that can be achieved include:
- Taking subjects to exotic destinations such as tropical beaches or bustling city streets. - Crafting fantastical environments like outer space, enchanted forests, or underwater worlds. - Incorporating historical or iconic landmarks as a backdrop, such as the Eiffel Tower or the Great Wall of China. - Seamlessly blending multiple images together to create composite shots that combine different backgrounds and elements.Cost and Time Efficiency
| Cost and Time Efficiency |
|---|
| 1. Faster Production |
| Green screen photography allows for quicker photoshoots and video shoots as it eliminates the need for on-location shooting. With a green screen setup, backgrounds can be easily added or replaced during post-processing, saving significant time. |
| 2. Lower Production Costs |
| By utilizing green screen technology, production costs can be reduced. There's no need for expensive location scouting, travel expenses, or set construction. This cost-effective approach makes it ideal for small-scale productions or businesses with limited budgets. |
| 3. Versatile Background Options |
| Green screen photography provides endless background possibilities. Instead of physically changing locations, photographers and videographers can digitally insert various backgrounds, whether it's a tropical beach, bustling city, or outer space scene. This flexibility offers creative freedom and enhances the overall production value at minimal cost. |
Creative Freedom
In green screen photography, one of the biggest benefits is the immense creative freedom it offers for crafting bespoke backgrounds. With green screen technology, photographers have the capability to replace the green backdrop with any image or video during post-processing. This grants limitless possibilities and the capacity to transport subjects to any desired location or scenario. Whether it involves placing the subject in front of iconic landmarks or conjuring up fantastical scenes, green screen photography provides the flexibility to bring any artistic vision to life. This unfettered creative freedom empowers photographers to unleash their imagination and produce unparalleled and captivating images that truly stand out.
Equipment and Setup for Green Screen Photography
Ready to create stunning visual effects? We're diving into the world of green screen photography equipment and setup. Find out all you need to know about green screen material, lighting setup, and the perfect camera and tripod combo. Get ready to unleash your creativity and capture captivating scenes against a virtual backdrop. Let's get that perfect shot and bring your imagination to life in ways you never thought possible!Green Screen Material
Green screen material is an essential component in green screen photography. It is typically crafted from either fabric or vinyl. The material should possess a vibrant and uniform shade of green, such as Chroma green, for optimal chroma keying. To ensure a flawless final image, the fabric used should be wrinkle-free. Vinyl is a favored option due to its durability and ease of maintenance. When choosing the green screen material, it is important to consider factors like size, portability, and the specific requirements of your photography setup. Investing in high-quality green screen material will undoubtedly yield superior and seamless final images.
| Material Type | Pros | Cons |
| Fabric | - Lightweight and portable | - May require steaming or ironing to remove wrinkles |
| Vinyl | - Durable and easy to clean | - Can be heavier and less portable |
Lighting Setup
Having the right lighting setup is crucial for successful green screen photography. Here are some key tips to follow for your lighting setup:
- Use three-point lighting: This includes a key light to illuminate the subject, a fill light to reduce shadows, and a backlight to separate the subject from the background.
- Avoid lighting spills: Ensure that the lighting setup doesn't spill onto the green screen, as it can cause unwanted reflections and affect the chroma keying process.
- Use soft lighting: Implement soft, diffused lighting to create even illumination and minimize harsh shadows.
- Consider the color temperature: Match the color temperature of your lighting setup with that of the background you plan to use for a seamless look.
- Test and adjust: Experiment with different lighting setups and make necessary adjustments to achieve the desired results.
Camera and Tripod
When it comes to green screen photography, having the right camera and tripod setup is crucial for achieving professional results. Here are some key considerations:
- Camera: When choosing a camera, opt for one with manual settings. This will give you full control over exposure, focus, and white balance. DSLR or mirrorless cameras are popular choices among photographers due to their versatility and exceptional image quality.
- Tripod: Your camera's stability during long exposures is essential, so investing in a sturdy tripod is a must. Look for features like adjustable height, stability, and quick release plates for added convenience.
- Remote shutter release: To eliminate camera shake, make use of a remote shutter release or the timer function on your camera.
- Leveling: Ensure that your tripod is level to avoid any tilting or distortion in your images.
- Positioning: Experiment with different heights and angles to find the best position for your camera in relation to the subject and the green screen.
The use of tripods in photography dates back to the early 19th century when cameras were large and bulky, making handheld shooting impractical. Tripods provided stability and allowed photographers to capture sharp, steady images. Today, tripods remain an essential tool for photographers as they offer stability, precise adjustments, and the ability to shoot long exposures and video footage. Modern tripods have evolved with lightweight materials and innovative features to meet the varied needs of photographers in different shooting situations.
Tips for Successful Green Screen Photography
Ready to level up your green screen photography game? In this section, we've got the tips and tricks you need for success. From mastering proper lighting techniques to nailing the perfect distance and positioning, we'll show you how to create seamless and professional-looking compositions. Worried about pesky green screen wrinkles and shadows? Don't fret, we'll share some expert insights on how to conquer those challenges too. Get ready to take your green screen photography to the next level with these game-changing tips!Proper Lighting Techniques
- Proper lighting techniques are crucial for successful green screen photography. Follow these steps to achieve optimal lighting:
- Ensure even lighting across the screen by positioning key lights on either side.
- Place a backlight behind the subject to separate them from the background.
- Utilize diffusers or softboxes to eliminate harsh shadows and create a more uniform lighting setup.
- Avoid spillage from the green screen onto the subject by positioning lights at an angle.
- Adjust the intensity and color temperature of the lights to match the desired background.
- Regularly check the lighting during the shoot to maintain consistency and make adjustments if necessary.
Distance and Positioning
When it comes to green screen photography, achieving seamless results requires careful consideration of distance and positioning. Here are some valuable tips to keep in mind:
- To avoid shadows and spillage, it is crucial to maintain an appropriate distance between the subject and the green screen.
- For even lighting and easy extraction during post-processing, position the subject in the center.
- Capture the subject at eye level by adjusting the height and angle of the camera, which helps create a more natural look.
- To ensure consistent positioning, use markers or guides on the floor that assist the subject.
- It is essential to experiment with various distances and angles to find the optimal setup for your specific project.
By following these suggestions, you can enhance the precision and ease of capturing subjects in your green screen photography.
Green Screen Wrinkles and Shadows
To prevent any green screen wrinkles and shadows in your photography, it's important to consider a few key factors. First, make sure that your green screen material is tightly stretched and free from any folds or creases. These can create unwanted shadows and wrinkles in the background. Lighting also plays a crucial role in minimizing shadows. Utilize a setup with soft, diffused lights that evenly illuminate the scene, thus eliminating harsh shadows. Proper positioning and maintaining an optimal distance between the subject and the green screen can further help avoid any undesired shadows or wrinkles. By carefully considering these aspects, you can achieve a seamless and smooth green screen effect in your photographs.
Editing and Post-Processing in Green Screen Photography
In the world of green screen photography, editing and post-processing hold the key to creating realistic and captivating images. Let's dive into the exciting realm of editing software, where we'll uncover the magic of chroma keying. We'll also explore the art of matching lighting and shadows to bring your subjects to life. And, we can't forget the thrill of adding realistic backgrounds that will transport your audience to another world. Get ready to unleash your creativity and take your green screen photography to new heights.Chroma Keying in Editing Software
Chroma keying, also known as green screen editing, plays a vital role in the post-processing of green screen photography. This technique is essential for replacing the green background with an image or video of your choice. To accomplish this task, professionals primarily rely on editing software such as Adobe Photoshop or Final Cut Pro. The process entails selecting the range of green color and eliminating it, resulting in only the subject remaining. Consequently, the modified image can be seamlessly integrated onto a new background. Utilizing chroma keying within editing software provides photographers with immense flexibility and sparks creativity, allowing them to produce breathtaking and lifelike compositions. This skill is indispensable for individuals working in film production, photography studios, and even those aiming to use virtual backgrounds for video conferencing.
Matching Lighting and Shadows
Matching lighting and shadows is a crucial step in achieving realistic and seamless green screen photography results.
To ensure a proper lighting setup, follow these steps:
Place your subject and green screen in a well-lit area with even lighting to avoid harsh shadows.
Position your lighting sources strategically to create a consistent and balanced lighting environment.
Use Key Lights to illuminate your subject, ensuring they are well lit and evenly exposed.
Add Fill Lights to reduce shadows and create a more even lighting distribution.
Place Back Lights behind your subject to separate them from the green screen and create depth.
Adjust the intensity of each light source to achieve a natural and uniform lighting effect.
Regularly check for any unwanted shadows or reflections on the green screen and adjust lights accordingly.
By carefully matching the lighting and shadows in your green screen photography, you can create professional-looking images or videos with realistic and believable backgrounds.
Adding Realistic Backgrounds
When it comes to adding realistic backgrounds in green screen photography, there are several steps that need to be taken to seamlessly blend the subject with the chosen background.
- First and foremost, carefully select a high-resolution background image that perfectly complements the subject and the desired scene.
- It is essential to ensure proper lighting on both the subject and the green screen. This will help avoid any unwanted shadows and achieve uniform lighting.
- Next, use chroma keying in editing software to remove the green screen and replace it with the carefully chosen background.
- To make the composition look realistic, make necessary adjustments to the lighting and color of the subject to match the lighting conditions present in the background.
- In order to enhance the overall realism of the composition, consider adding additional elements such as shadows, reflections, or even depth of field.
- Lastly, critically review the final image to identify any areas that might require further adjustments or refinements.
Types of Green Screen Photography Uses
Discover the diverse applications of green screen photography! From film and television production to photography studios and virtual backgrounds for video conferencing, this section will showcase the various ways in which green screens are utilized. Get ready to delve into the exciting world where imagination meets technology, as we explore the creative possibilities and practical uses of this innovative photographic technique.Film and Television Production
In the realm of film and television production, green screen photography is extensively used to create dynamic and visually captivating scenes. It allows filmmakers to replace the green background with any desired backdrop, bringing imagination to life.
| Versatility in Backgrounds | Green screen technology allows for seamless integration of actors into various environments, whether it's a bustling city or an exotic location. |
| Cost and Time Efficiency | Using green screen reduces the need for costly on-location shoots and extensive set construction, making production more efficient. |
| Creative Freedom | Green screen provides filmmakers with the freedom to explore boundless creative possibilities, enabling the creation of fantastical and otherworldly scenes. |
To ensure successful green screen photography, proper lighting techniques and attention to detail are crucial. Post-processing techniques like chroma keying and matching lighting and shadows play a vital role in achieving realistic results.
In the realm of film and television production, green screen photography is extensively used to create captivating scenes and breathe life into the imagination. With the versatility of backgrounds, cost and time efficiency, and creative freedom it offers, green screen technology has become an indispensable tool in the industry.
Photography Studios and Portraits
Photography studios and portraits benefit greatly from green screen photography. This technique offers endless possibilities for creating unique and customized backgrounds. Here are some advantages:
- Flexibility: Green screen allows photography studios and portraits to create any desired background, from exotic locations to fantasy worlds.
- Efficiency: With green screen technology, photographers specializing in studios and portraits can shoot multiple backgrounds in a single session, saving time and resources.
- Creative control: Green screen enables photographers in photography studios and portraits to exercise their creativity and offer clients personalized and imaginative portraits.
Virtual Backgrounds for Video Conferencing
Using virtual backgrounds for video conferencing can significantly enhance your online meetings and presentations. Incorporating virtual backgrounds into your video calls offers several benefits:
- Heighten your professionalism: By using virtual backgrounds, you can create a polished and distraction-free backdrop, projecting a more professional image during your meetings.
- Represent your brand: Take advantage of customizing your virtual background to showcase your company logo or branding. This helps reinforce your brand identity throughout video conferences.
- Ensure privacy and personalization: Utilize a virtual background to maintain privacy by concealing your actual surroundings. Furthermore, personalize your virtual space with images that reflect your personality or interests.
- Boost engagement: Get creative with virtual backgrounds to add visual interest and captivate your audience during presentations or team meetings.
Some Facts About Green Screen Photography:
- ✅ Green screen, also known as chroma key, is a backdrop used in video production to superimpose one image over another. (Source: Lumapixel)
- ✅ The most commonly used color for green screens is green, as it provides the best contrast with human skin tone. (Source: Lumapixel)
- ✅ To use a green screen for videos and photos, you need to choose a location with a large enough and well-lit backdrop. (Source: Lumapixel)
- ✅ Proper lighting is crucial for green screen photography, with the recommended three-point lighting technique. (Source: Fotor)
- ✅ Green screen photography allows for easy removal of the background and replacement with a desired image. (Source: Fotor)


