Mastering Camera Settings for Perfect Photo Booth Shots – Expert Guide
Share
Unlock Perfect Photo Booth Shots: Camera Settings Mastery
Ready to dominate the photo booth market? It's time to master your camera settings and leave your competition in the dust. In this guide, we'll dive deep into the game-changing world of DSLR and mirrorless cameras, focusing on the Canon R50 and M50 models that are revolutionizing the industry.
DSLR vs. Mirrorless: Choosing Your Weapon
The battle between DSLR and mirrorless cameras rages on, but for photo booths, both have their merits:
- DSLR: Thicker body, generally slower & older technology.
- Mirrorless: Thinner body, lighter, newer technology.
But most importantly: The Mirrorless Cameras have much better auto focus that continuously track the subject's eyes.
Choosing Your Cash-Generating Camera
First things first, you need the right tool for the job. We're talking DSLR or mirrorless cameras that can tether to your iPad or computer for instant results. Let's spotlight two crowd favourites:

Canon R50: This mirrorless marvel packs a punch with its compact size and killer image quality.

Canon M50: A versatile DSLR-style mirrorless that's perfect for photo booth beginners and pros alike.
First thing first: Setting Up the Camera
Set the Camera to Manual Mode:
- Locate the Mode Dial on the top of the camera.
- Rotate the dial until the white dash aligns with M (Manual exposure).
Turn Off Image Stabilization (IS)
- Press Menu.
- Go to Menu 6.
- Go down and select IS (Image Stabilization) mode.
- Set IS mode to Off.
Set to One Shot AF
- Select Shooting settings.
- Go to Menu 4.
- Select AF operation.
- Set to ONE SHOT AF.
Enable Continuous AF
- Select Shooting settings.
- Go to Menu 4.
- Go down to Continuous AF.
- Set to Enable.
Set Focus Mode to AF
- Select Shooting settings.
- Go to Menu 4.
- Go down to Focus Mode.
- Set to AF (Auto Focus).
Set Image Quality to S1 (Fine)
- Go to Menu 1.
- Set image quality to S1 (Fine).
Disable Auto Power Off
- Press Menu.
- Move right to Function settings.
- Go to Menu 2.
- Go down to Power saving.
- Go down to Auto power off.
- Set to Disable.
Set Picture Profile/Style to Neutral
- Press Menu
- Go to menu 3
- Select Picture Style
- Select Neutral
- Hit set to save.
Some Facts About Camera Settings for Photo Booths:
-
⚠️ When your camera is plugged into a computer via a USB cable, the software on the computer takes over the camera. The settings need to be changed from your photobooth software. If you make any changes from the camera itself, they will not reflect in the software.
- ✅ DSLR-based photo booths require knowledge of ISO, shutter speed, and aperture settings.
- ✅ ISO is used to brighten photos when longer shutter speed or wider aperture cannot be used.
- ✅ Shutter speed determines how long the camera's shutter is open, affecting the amount of light entering the sensor.
- ✅ In photo booths, higher shutter speeds are recommended to capture sharp images, but it's important to find a balance with ISO and aperture.
- ✅ Aperture controls the amount of light entering the camera and affects the depth of field.
The Holy Trinity: ISO, Shutter Speed, and Aperture
Mastering these three settings is crucial for stunning photo booth shots:
ISO Settings
Recommended: 200-400
Shutter Speed
Recommended: 1/200
Aperture
Recommended: f/9.0 - 11.0
For a controlled environment, stick to these magic numbers:
- ISO: 200
- Shutter Speed: 1/200
- Aperture: f/9.0
These settings will give you crisp, well-exposed group shots that'll make your clients say "Wow!"
White Balance
- White Balance: Custom setting for consistent colors
- Avoid Auto White Balance: Saves time in post-processing
- Fine-Tune Tones: Adjust blue/yellow and green/magenta for picture-perfect profits - do this at EVERY EVENT. (Even for B&W Glam Booths)
Remember, avoid auto white balance like the plague. It's inconsistent and will cost you in post-processing time. Instead, use custom white balance and fine-tune those blue/yellow and green/magenta tones for picture-perfect profits.
Lighting: The Secret Sauce
Great lighting is the difference between amateur hour and pro-level cash flow, it can make or break your photo booth. Here's what you need:
- Strobe lights (e.g., Godox 300, AlienBees 160W)
- Beauty dish for flawless facial illumination (Great for outdoor events)
- LED constant light options for Video only (not for photos)
Pro tip: Set your flash to full power for 160W and half power for 300W lights.
.jpg)
.jpg)
Framing: The Art of the Perfect Shot
Composition is key in photo booth photography. Remember these tips:
- Follow the rule of thirds
- Avoid excessive headroom or side space that reveals what is behind your backdrop.
- Frame the guests to accommodate varying heights
Advanced Techniques and Software Integration
To truly dominate the photo booth scene, you need to leverage technology:
- Tether your camera to an iPad, Surface Pro tablet, or mini PC
- Use LA Photo Party software for streamlined workflow
- Experiment with wireless printing for instant gratification
For in-depth guidance on camera setup and in-app settings, don't miss our detailed tutorials:
- In-App Camera Settings Guide
- Camera Setup Tutorial
Backdrops: The Final Touch
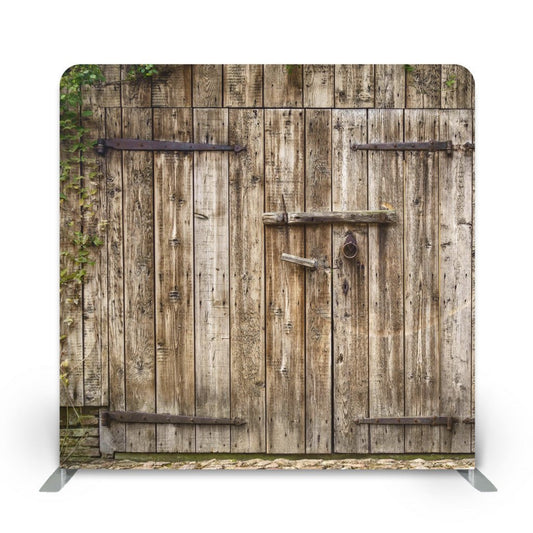
A great backdrop can elevate your photo booth from good to unforgettable. Explore our collections to find the perfect backdrop for any event:
 |
 |
 |
- Classic Photo Booth Backdrops
- Dreamy Blurry Lights Collection
- Trendy Boho Collection
- Urban Brick Wall Collection
Scaling Your Photo Booth Empire
Now that you've got the technical stuff down, it's time to think big. Here's how to scale your photo booth business into an empire:
- Train your team to nail these settings every time
- Implement quality control processes for consistent results
- Upsell premium packages based on your superior image quality
- Shift your mindset from photographer to business mogul
Remember, you're not just taking pictures; you're creating experiences and memories. That's what clients pay the big bucks for.
Common Problems and Troubleshooting
When setting up a photo booth, there are common problems and troubleshooting tips that can help you address these issues. Here is a list of common problems and troubleshooting tips to keep in mind:
- Camera Not Turning On: Check the battery or power source to ensure it is properly connected.
- Blurry Photos: Adjust the focus settings on the camera to ensure clear images.
- Overexposure: Adjust the camera's exposure settings to prevent washed-out photos.
- Lighting Issues: Make sure the photo booth is well-lit and avoid using harsh or uneven lighting sources.
- Printing Problems: Ensure the printer has enough paper and ink, and check the connectivity between the camera and printer.
Frequently Asked Questions
What are the essential camera settings for achieving clear and tack sharp photos in a photo booth?
To achieve clear and tack sharp photos in a photo booth, it is recommended to use a fast shutter speed, low ISO, and a larger aperture. These settings help freeze motion, reduce noise, and create a shallow depth of field, resulting in sharp images.How can I find the right balance between ISO, shutter speed, and aperture settings in a photo booth?
Finding the right balance between ISO, shutter speed, and aperture requires practice and experimentation. Start with semi-manual settings on the camera, which allow more control while still having some settings in auto mode. Continuously explore and adjust these settings to achieve the desired results.Can photo booths capture photos in both day and night settings?
Yes, photo booths can capture photos in both day and night settings. Your powerful strobe light flash should overpower any ambient light in the room, whether it's day or night. This means your camera settings should remain mostly consistent, with perhaps only minor adjustments to the white balance. The only exception is if you're doing an event outdoors in direct sunlight, where you may need to adjust the camera settings accordingly.
How can I enhance photos taken with a GoPro Hero 12 in a photo booth?
To enhance photos taken with a GoPro Hero 12 in a photo booth, it's all about the lighting. Whether you're using a GoPro or an iPhone, good lighting is key. Get yourself three (3) quality LED constant lights, and you'll see a world of difference in the quality of your photos. These lights will help create a well-lit environment, ensuring your photos look professional and vibrant.
Conclusion: Your Path to Photo Booth Domination
Mastering camera settings for your photo booth isn't just about technical know-how—it's about creating unforgettable experiences. With the right gear, settings, and creativity, you'll be well on your way to becoming the go-to photo booth provider in your area.
Remember, the difference between a good photo booth and a great one often comes down to the details. So, fine-tune those settings, experiment with lighting, and don't be afraid to push the boundaries of what a photo booth can be.
Ready to take your photo booth game to the next level? Explore our full range of photo booth backdrops and accessories and start creating magic today!



2 comments
Hi Lance, when your camera is plugged into a computer via a USB cable, the software on the computer takes over the camera. The settings need to be changed from your photobooth software. If you make any changes from the camera itself, they will not reflect in the software.
I could not find information on H O W to change camera settings. They are not in settings or anyplace else. HOW do I change Photo Booth camera settings ??