10 Creative DIY Wedding Photo Booth Ideas for Memorable Moments
Share
.jpg)
DIY wedding photo booths have become a popular choice among couples looking to add a touch of personalization and fun to their special day. With a DIY photo booth, you can create a unique experience for your guests while capturing memorable moments that will last a lifetime.
There are several reasons why choosing a DIY photo booth for your wedding is a great idea:
- Cost-Effective: DIY photo booths are a more affordable alternative to renting a professional photo booth, allowing you to allocate your budget to other aspects of your wedding.
- Personalized Touch: With a DIY setup, you have full control over the design, props, and backdrop, allowing you to infuse your personality and wedding theme into the photo booth experience.
- Fun and Interactive Experience for Guests: Photo booths create a lively atmosphere, encouraging guests to interact and have fun while creating lasting memories.
Setting up your DIY wedding photo booth involves a few key considerations:
- Selecting the Perfect Location: Choose a well-lit area that is easily accessible for guests to capture their photos comfortably.
- Backdrop and Props: Create a visually appealing backdrop that complements your wedding theme and provide an array of props that reflect your personal style.
- Lighting: Proper lighting is essential for high-quality photos. Ensure the area is well-lit, either using natural light or adding artificial lighting to enhance the photo booth experience.
For creative DIY photo booth ideas, consider:
- Polaroid Guestbook: Encourage guests to take photos and leave a personalized message in a scrapbook or guestbook using Polaroid cameras.
- Vintage-Inspired Photo Booth: Create a nostalgic ambiance with vintage props, furniture, and decor for a classic photo booth experience.
- Themed Photo Props: Provide themed props that align with your wedding theme, such as hats, masks, signs, or funny accessories for guests to use in their photos.
- Greenery Wall: Decorate a wall with lush greenery for a natural and elegant backdrop for the photo booth.
- Balloon Arch: Create an eye-catching balloon arch as a stunning backdrop for your DIY photo booth, adding a touch of whimsy to the space.
To ensure the success of your DIY photo booth, make sure you have the necessary equipment:
- Camera: Use a good-quality camera, such as a DSLR or mirrorless camera, to capture high-resolution photos.
- Tripod: Set up a sturdy tripod to keep the camera stable and ensure steady shots.
- Remote Shutter Release: Invest in a remote shutter release for the camera to allow guests to capture their own photos without the need for assistance.
Finally, to capture memorable photos, encourage guests to have fun and be creative. Provide clear instructions on how to operate the photo booth equipment and consider setting up a designated area for guests to share and display their printed photos. With these tips, your DIY wedding photo booth is sure to be a hit and will create lasting memories for both you and your guests.
Why Choose a DIY Photo Booth for Your Wedding?
Looking to add some extra flair and personalization to your wedding? Say hello to the world of DIY photo booths! In this section, we’ll explore why choosing a DIY photo booth for your big day is a fantastic idea. From being a cost-effective option to adding a personalized touch that will leave your guests in awe, and let’s not forget the fun and interactive experience it promises. Get ready to dive into the benefits of DIY wedding photo booths that will make your special day even more memorable.
1. Cost-Effective
Choosing a DIY photo booth for your wedding is a cost-effective choice that still allows you to create memorable moments for yourself and your guests. There are several reasons why opting for a DIY photo booth is a budget-friendly option:
- 1. Flexibility: By choosing a DIY photo booth, you have the advantage of controlling the materials and props used, allowing you to stay within your budget.
- 2. Personalization: With a DIY photo booth, you can easily customize the backdrop and props to match your wedding theme, all without incurring additional costs.
- 3. Entertainment: Guests can enjoy interactive photo sessions throughout the event, providing unique entertainment without the need to hire a professional photographer.
Pro-tip: To save money, consider recruiting a friend or family member to manage the photo booth and capture candid moments.
2. Personalized Touch
A personalized touch is added to your wedding with a DIY photo booth, making it unique and memorable. Here are some ideas to customize your photo booth experience:
- Design a backdrop that reflects your theme or wedding colors.
- Create personalized props that represent you as a couple.
- Add a guestbook station where guests can take photos and leave messages.
- Incorporate a slideshow of your favorite photos as a backdrop.
- Use unique and creative photo filters to enhance the photos.
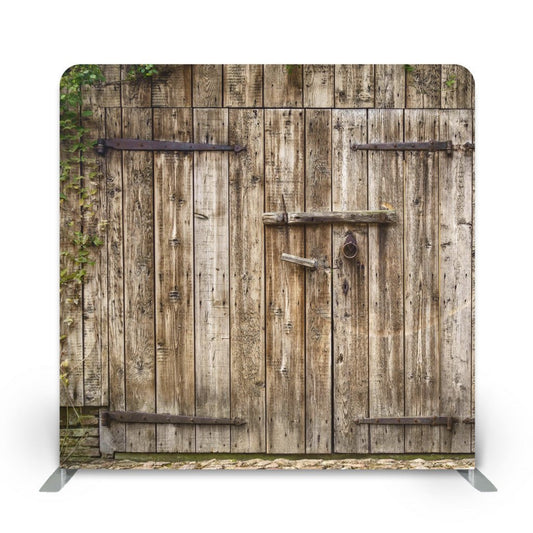
One couple created a DIY photo booth with a rustic wood backdrop, vintage furniture props, and a suitcase full of costumes. Guests had a blast trying on different outfits and striking hilarious poses, resulting in some of the most memorable moments and photos of the entire wedding.
3. Fun and Interactive Experience for Guests
A DIY wedding photo booth can provide a fun and interactive experience for guests. Here are some ideas to make it even more enjoyable:
- 1. Polaroid Guestbook: Encourage guests to have a fun and interactive experience by taking photos and leaving a message in a dedicated guestbook.
- 2. Vintage-Inspired Photo Booth: Create a nostalgic atmosphere with vintage props and vintage-style photo filters, enhancing the interactive experience for guests.
- 3. Themed Photo Props: Enhance the fun and interactive experience by providing various props that match the wedding theme, such as hats, masks, and signs.
- 4. Greenery Wall: Decorate the backdrop with fresh flowers or greenery to create a natural and elegant look, adding to the overall interactive experience for guests.
- 5. Balloon Arch: Create a colorful balloon arch for guests to pose in front of, offering them a fun and interactive experience.
These interactive elements will keep guests entertained and provide a fun and interactive experience, resulting in memorable photos for the couple to cherish.
Setting Up Your DIY Wedding Photo Booth
Setting up a fantastic DIY wedding photo booth is an exciting venture. In this section, we’ll uncover the secrets to creating a memorable photo booth experience for you and your guests. From selecting the perfect location that sets the right ambiance, to designing a stunning backdrop with creative props, and ensuring the best lighting for flawless pictures. Let’s dive into the nitty-gritty of setting up your DIY wedding photo booth and capturing those cherished moments in style!
1. Selecting the Perfect Location
When selecting the perfect location for a DIY wedding photo booth, it is crucial to consider the following factors:
1. Accessibility:
Make sure to choose a location that is easily accessible to all guests. This will ensure that everyone can easily find and enjoy the photo booth.
2. Lighting:
Look for a spot that has ample natural light. If natural light is not available, consider bringing additional lighting equipment to ensure that the photos come out beautifully.
3. Background:
Find an area with a visually appealing backdrop that complements the overall wedding theme. This will enhance the aesthetics of the photos and make them more memorable.
4. Space:
It is important to ensure that the location has enough space to accommodate the photo booth setup. This way, guests can comfortably pose for photos without feeling cramped.
5. Privacy:
Select a location that provides some level of privacy for guests. This will allow them to feel comfortable and fully enjoy their photo-taking experience.
By considering these factors, you can make the best choice for the location of your DIY wedding photo booth.
2. Backdrop and Props
When setting up a DIY wedding photo booth, the selection of the appropriate backdrop and props becomes crucial in order to create an enjoyable and unforgettable experience for your guests. The backdrop not only sets the atmosphere for the photos, but it can also be customized to match your chosen wedding theme or style. You have various options to consider, such as floral walls, rustic wooden backdrops, or even a sparkling sequin backdrop, to make it truly unique. When it comes to props, take into consideration the theme of your wedding and try to incorporate items that will add a touch of individuality and entertainment to your photos. These props can range from vintage-inspired accessories to thematic elements that reflect your personal style. By creating an appealing visual backdrop and offering a wide array of props, you can ensure that your guests will have an incredible time capturing moments at your wedding celebration.
3. Lighting
Proper lighting is an essential aspect to consider when setting up a DIY wedding photo booth. It plays a crucial role in ensuring that the photos turn out beautiful and of high quality.
- One option is to make use of natural light. Place your photo booth near a window or outdoors during the day to take advantage of the available sunlight.
- In case you are hosting an evening event or have limited access to natural light, it would be worth investing in high-quality artificial lighting alternatives.
- To achieve even and diffused lighting that minimizes harsh shadows, consider utilizing softbox lights.
- To add a romantic and whimsical ambiance to your photo booth, fairy lights or string lights can be an excellent choice.
- Experimenting with different lighting setups will allow you to achieve the desired effect and enhance the overall atmosphere of your booth.
During my cousin’s wedding, their DIY photo booth was set up in a beautiful garden, with twinkling fairy lights hanging above. The warm and soft lighting created a magical backdrop, resulting in stunning and memorable photos. These pictures captured the joy and love of the occasion effectively.
DIY Photo Booth Ideas
Looking to add some charming and memorable moments to your wedding? Look no further than our DIY Photo Booth Ideas! Get ready to capture laughter, love, and a whole lot of fun with our creative sub-sections. From the nostalgic Polaroid Guestbook to the timeless Vintage-Inspired Photo Booth, and even a Greenery Wall or a Balloon Arch, we have you covered. Let’s dive into these inventive ideas and make your wedding day truly unforgettable!
1. Polaroid Guestbook
The Polaroid guestbook is a creative and nostalgic addition that you can incorporate into your DIY wedding photo booth.
- Consider setting up a dedicated table where guests can use a Polaroid camera to take a photo and then attach it to a guestbook page.
- Make sure to provide pens or markers for guests to write a heartfelt message or offer some advice next to their photo.
- By utilizing a Polaroid guestbook, you can create a unique keepsake that captures all the wonderful memories from your special day in a fun and interactive way.
- Guests will truly enjoy being a part of this process and will surely appreciate the personalized touch it adds to your wedding.
- Additionally, having a Polaroid guestbook is a fantastic way to have a physical copy of each and every guest who attends your wedding.
Sharing a true story: My friend’s wedding featured a Polaroid guestbook, and it turned out to be an enormous hit. The guests had an absolute blast taking photos and jotting down their heartfelt messages, resulting in creating a beautiful keepsake that the couple will forever cherish. This unique and interactive experience truly added an exceptional touch to their wedding day.
2. Vintage-Inspired Photo Booth
To create a vintage-inspired photo booth for your wedding, consider the following:
-
Choose a nostalgic theme: Incorporate vintage props like old cameras, suitcases, and hats to create a retro atmosphere.
-
Select a vintage-inspired backdrop: Opt for lace curtains, floral patterns, or old-fashioned wallpaper to set the scene.
-
Add vintage-inspired props: Include props like feather boas, vintage frames, and antique furniture to enhance the vintage aesthetic.
-
Use sepia-toned filters: Apply filters to your photos to give them an aged, nostalgic feel.
-
Create a vintage-inspired guestbook: Set up a table with a typewriter or vintage-style scrapbook for guests to leave their well wishes.
-
Play vintage music: Set the mood by playing music from the era or using a vintage-inspired playlist.
To create a vintage-inspired photo booth for your wedding, incorporate the following:
-
Choose a nostalgic theme: Incorporate vintage props like old cameras, suitcases, and hats to create a retro atmosphere.
-
Select a vintage-inspired backdrop: Opt for lace curtains, floral patterns, or old-fashioned wallpaper to set the scene.
-
Add vintage-inspired props: Include props like feather boas, vintage frames, and antique furniture to enhance the vintage aesthetic.
-
Use sepia-toned filters: Apply filters to your photos to give them an aged, nostalgic feel.
-
Create a vintage-inspired guestbook: Set up a table with a typewriter or vintage-style scrapbook for guests to leave their well wishes.
-
Play vintage music: Set the mood by playing music from the era or using a vintage-inspired playlist.
3. Themed Photo Props
Themed photo props are a fantastic addition to any DIY wedding photo booth, adding a touch of personalization and fun to the experience. Here are some ideas to inspire you:
- Festive props: Include props that match your wedding theme or colors, such as hats, masks, and boas.
- Signs and frames: Have themed signs or frames with fun phrases or quotes for guests to hold up in their photos.
- Props related to your interests: Incorporate props that reflect your hobbies or shared interests as a couple, such as sports equipment or musical instruments.
- Vintage props: For a retro vibe, provide vintage-inspired props like old cameras, vinyl records, or vintage hats.
- Nature-themed props: If you’re hosting an outdoor or nature-inspired wedding, include props like flower crowns, faux grass, or butterfly wings.
These themed photo props will add an extra element of excitement and creativity to your DIY wedding photo booth, ensuring that your guests have a memorable and enjoyable time capturing fun moments.
4. Greenery Wall
A greenery wall is a beloved DIY photo booth idea that effortlessly incorporates a touch of nature and elegance to your wedding. It can function as a captivating backdrop for your guests to capture unforgettable moments against. To construct a greenery wall, you will require a durable frame, such as a wooden lattice or metal grid, along with a variety of lush green foliage, like eucalyptus or ivy. Simply fasten the greenery to the frame using zip ties or floral wire. The outcome is a breathtaking wall of green that will harmonize with any wedding theme and provide a picturesque setting for your guests to immortalize memories.
5. Balloon Arch
A balloon arch is a creative and festive addition to any DIY wedding photo booth. It adds a pop of color and a whimsical touch to your backdrop. Here are a few tips to create a stunning balloon arch:
- Choose your colors: Select balloons in colors that match your wedding theme or palette. You can use a single color for a simple look or opt for a mix of colors for a vibrant display.
- Invest in a balloon arch kit: These kits typically include everything you need, such as an arch frame, balloons, and tape. They make the process easier and ensure a professional-looking result.
- Start with a sturdy base: Use sandbags or weights to secure the bottom of the balloon arch. This will prevent it from tipping over or shifting during the event.
- Create the arch shape: Inflate the balloons to different sizes and attach them to the arch frame using balloon tape or balloon clips. Start at one end and work your way to the other, gradually shaping the balloon arch as you go.
- Add finishing touches: Once the balloon arch shape is complete, you can add extra decorations like greenery, flowers, or fairy lights to enhance the overall look.
DIY Photo Booth Equipment
Looking to add some extra flair to your wedding? Look no further than our DIY Photo Booth Equipment. In this section, we dive into the essential tools that will help you capture the most unforgettable memories. From the versatile camera options to the sturdy tripods that ensure the perfect shot, and don’t forget the convenience of a remote shutter release. Get ready to turn your wedding into a photo wonderland with these must-have equipment choices.
1. Camera
When setting up a DIY wedding photo booth, the choice of camera is essential in capturing those memorable moments. It is crucial to select a camera that meets certain considerations for your wedding photo booth:
1. Quality: Ensure that the camera you choose has high resolution and image quality, guaranteeing clear and sharp photos.
2. Features: Opt for a camera with a wide range of shooting modes, including portrait and low light settings, to accommodate different lighting conditions.
3. Remote capabilities: Consider a camera that allows remote control, either through a smartphone app or a wireless remote, for convenience and ease of use.
Allow me to share a true story: During my friend’s wedding, they utilized a DSLR camera with a remote shutter release for their DIY photo booth. The photos turned out excellent, capturing many fun and candid moments throughout the night. The remote capabilities made it convenient for all the guests to take their own pictures without requiring someone to operate the camera. It was truly a memorable addition to their special day.
2. Tripod
A tripod is an essential piece of equipment for setting up a DIY wedding photo booth. Here are a few reasons why you should consider using a tripod:
- Stability: A tripod provides stability and prevents camera shake, resulting in sharper and clearer photos.
- Flexibility: With a tripod, you can easily adjust the height and angle of your camera, allowing you to capture the perfect shots.
- Hands-free operation: Using a tripod frees up your hands, making it easier to interact with guests and ensure that everyone gets a chance to take photos.
- Consistency: By using a tripod, you can maintain consistency in composition and framing, ensuring that all the photos have a professional look.
The first recorded use of a tripod dates back to ancient Greece, where it was used to support various instruments, including cameras. Over the years, tripods have evolved in design and materials, making them an indispensable tool for photography, including wedding photo booths. Tripods’ role in providing stability and flexibility has made them a popular choice among photographers worldwide.
3. Remote Shutter Release
Incorporating a remote shutter release is essential for operating a DIY wedding photo booth smoothly. With a remote, guests can easily capture their own photos without needing a photographer, adding convenience to the experience. Additionally, guests have the freedom to experiment with different poses and angles, resulting in more unique and candid shots, enhancing their creativity. The remote shutter release also gives the couple control over the timing of each photo, ensuring that everyone is ready before the picture is taken. This control adds an element of control to the photo booth setup. Moreover, a remote shutter release enables guests to take group photos easily, eliminating the need for someone to be left out to take the picture, providing flexibility.
Incorporating a remote shutter release in your DIY photo booth setup will provide convenience, enhance creativity, maintain control over the timing of each photo, and offer flexibility for your wedding guests. By incorporating this essential tool, you can significantly enhance the overall experience for your wedding guests.
Tips for Capturing Memorable Photos
When setting up a DIY wedding photo booth, here are some tips for capturing memorable photos:
- Background: Choose a visually appealing backdrop that complements the wedding theme and allows the couple to stand out.
- Props: Provide a variety of fun and thematic props, such as hats, sunglasses, and signs, to encourage guests to get creative.
- Lighting: Ensure proper lighting to avoid shadows and blurry photos. Use natural light or add additional lighting for a well-lit booth.
- Poses: Display a sign with suggested poses or provide a photographer who can guide guests to capture candid and unique shots.
- Printing: Set up a photo printer or instant camera to allow guests to print and take home their memorable photos as wedding favors.
Frequently Asked Questions
1. How can I create a DIY photo booth backdrop for my wedding party?
You have several options for creating a DIY photo booth backdrop. You can use the venue’s distinctive wall, work with a florist to create a backdrop with natural moss and florals, or DIY one by using plywood boards and craft store greenery and florals. Chalkboard backdrops can also be created using actual chalkboards, chalkboard cutouts, or by applying chalkboard paint to any surface.
2. What are some recommended photo booth apps for an iPad?
Some popular photo booth apps for iPads are Lumabooth and Wifibooth. These apps can transform your iPad into a photo booth station with various features like live preview, group pictures, decorative props, and the ability to email pictures.
3. Should I provide selfie sticks for guests to use in the photo booth?
Opinions differ on providing selfie sticks. Some users suggest not providing them as many people have difficulty using them and prefer to use their own phones. Other guests can take pictures or guests can take their own selfies with props. However, if you still want to provide selfie sticks, make sure they have built-in tripods and Bluetooth remote shutters for easier use.
4. How can I incorporate a vintage feel into my DIY photo booth?
If you want a vintage feel, consider using a Polaroid camera and extra film. Guests can take instant pictures, and you can even have them sign the pictures as a guest book idea. Polaroid cut-out frames customized with the couple’s names can be found on websites like Etsy.
5. What are some options for printing and sharing the photos taken in the DIY photo booth?
There are various options for printing and sharing the photos. One user mentioned using an app on an iPad that allowed guests to email pictures. They also printed and mailed the pictures with thank you cards. Another user suggested using a Raspberry Pi and a touch screen setup, which allowed guests to email pictures and sync them. Some photo booth apps even offer unlimited prints and the ability to create awesome GIFs.
6. How can I accommodate shy guests who may not want to ask others to take their pictures in the DIY photo booth?
To accommodate shy guests, you can consider hiring a photographer or setting up a tripod or stand with selfie timers. This allows guests to take their pictures without relying on others. Another option is to create a small adjoining room or pop-up tipi where guests can take pictures privately.
